Monitoring audio in your design using your PC sound card
If you are hosting your project on a NioNode, you can monitor the audio output from devices in the design using headphones or speakers connected to your PC sound card. This is handy for debugging.
The device that allows monitoring in this way is called the Wave File Recorder. It is available for NioNodes, but not other node types. There are different variants of the device for mono and stereo audio and different sample rates.
Notes:
- The sample rate for the player or recorder device must be set to a multiple of the project sample rate. For example, if the system sample rate is 48KHz (which is typical), then realistic values for the sample rate are 48000, 24000, or 12000.
- The interpolation value (for the player device) or decimation value (for the recorder device) when multiplied with the sample rate must equal the project sample rate. For example, if the sample rate is set to 12000 and the project sample rate is 48000, then the correct setting for interpolation or decimation is 4x.
- When you choose a player or recorder device with a particular sample rate, the interpolation or decimation is set automatically by NWare, according to the project sample rate you are using.
- The number of Wave File Players and Wave File Recorders you can add to your project is limited by the available memory on the NioNode that is hosting the project. If you add too many of these devices, an error will be displayed when the project is deployed. The memory usage is affected by a number of factors, including the sample rate and whether mono or stereo is selected.
- You cannot monitor audio in emulation mode – you must deploy the project.
To monitor audio in your design using headphones
- In the device tree, expand the DSP / Wave File Recorders folder.
- Expand the Stereo or Mono folder to show the Wave File Recorder for the sample rate used in your project.
- Drag a Wave File Recorder device over to the design page.
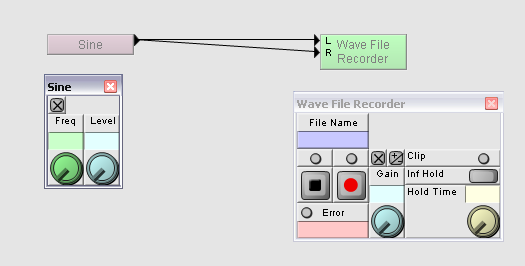
- Wire the Wave File Recorder to the device you want to monitor.
In the simple example below, we are monitoring the output from a Sine Wave Generator.

- Right-click the Wave File Recorder device block, and then click Device Properties.
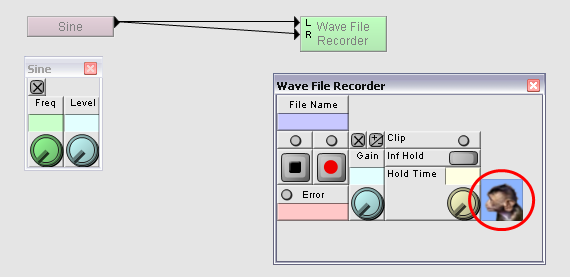
- Click Advanced, and then select the enable CHIMP check box.
- Click OK, and then again to close the Wave File Recorder device.
The CHIMP button is shown on the Wave File Recorder control surface, allowing you to switch to CHIMP mode.

- Deploy the project.
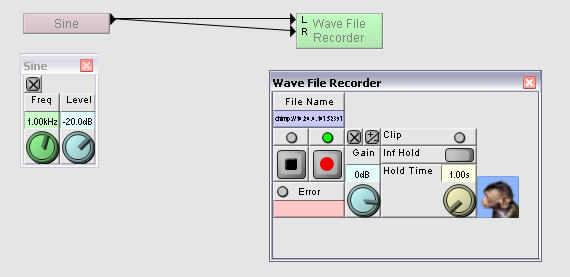
- When you are ready to start listening to the audio, click the CHIMP button.
The LED above the record button will be lit (green). The File Name box will be updated to show the IP address of the PC and port number used. If you click the button again, a new port number will be used.

Tip: If you cannot hear the audio you expect to hear, check that the frequency is in audible range. You can use a meter if you want a visual indication that a signal is present.


