![]()
![]()
|
|
|
A Project Link Client device is placed in the project that will be linked to the server project. There can be several client projects for each server project.
It is assumed that your client project already contains the devices that you would like to link to devices in the server project.
As part of the configuration, you can specify a setting called Poll period. This controls the frequency at which the client device will poll the server device. It can impact both network resources and NioNode resources, so it is important to understand the effect specifying different values will have.
The default value of 100ms means the server is polled 10 times a second. A value of 10ms means the server is polled 100 times per second, and so on. Using the default value usually results in good resource usage and a good GUI response time. Setting the polling value too high can result in a sluggish response from a control, i.e. too much latency between when the control is gestured and when the change is updated in the GUI. Always try to use good judgment when balancing the poll rate to safeguard against overuse of resources while providing a responsive interface.
To add a Project Link Client device
The Project Link Client Properties dialog box is displayed.
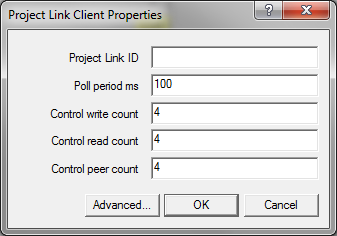
If you want the user to be able to specify the identifier when the project is deployed or emulated, leave the box empty.
These controls must be master wired to the write wiring nodes on the left of the device block. The valid range is 0 to 200.
These controls must be slave wired to the read wiring nodes on right of the device block. The valid range is 0 to 200.
These controls must be master wired to the peer wiring nodes on the left of the device block. The valid range is 0 to 200.
The Advanced properties dialog box is displayed.
|
See also Adding a Project Link Server device |