![]()
![]()
|
|
|
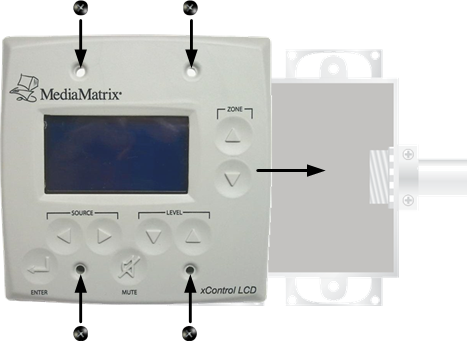
Normally, an xControl LCD is used to control devices in an NWare project, but the unit also supports bi-directional control, where the NWare xControl LCD device can be used to control the physical xControl LCD device.
Set up |
Bi-directional control required |
Switch position |
Single unit or unit at end of chain, one cable connected |
Yes |
Out |
No |
In |
|
Unit in middle of chain, two cables connected |
Yes |
Out |
No |
Out |
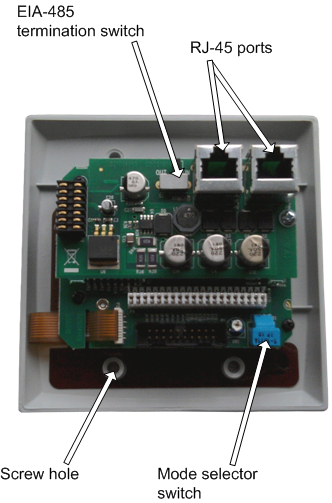
Position |
Mode |
1 |
PASHA protocol mode. This is the default mode. When the unit powers up, you will be prompted to log on. You must enter a valid user passcode before you can change settings using the front panel buttons. The default passcode is 677. |
2 |
Quick entry mode. Allows you to enable or disable user access to the unit using the on screen menus (and without removing it from the wall). Uses PASHA protocol. When the unit powers up, you will not be prompted to log on. |
C-F |
Reserved for MediaMatrix Support. |
|
See also |